
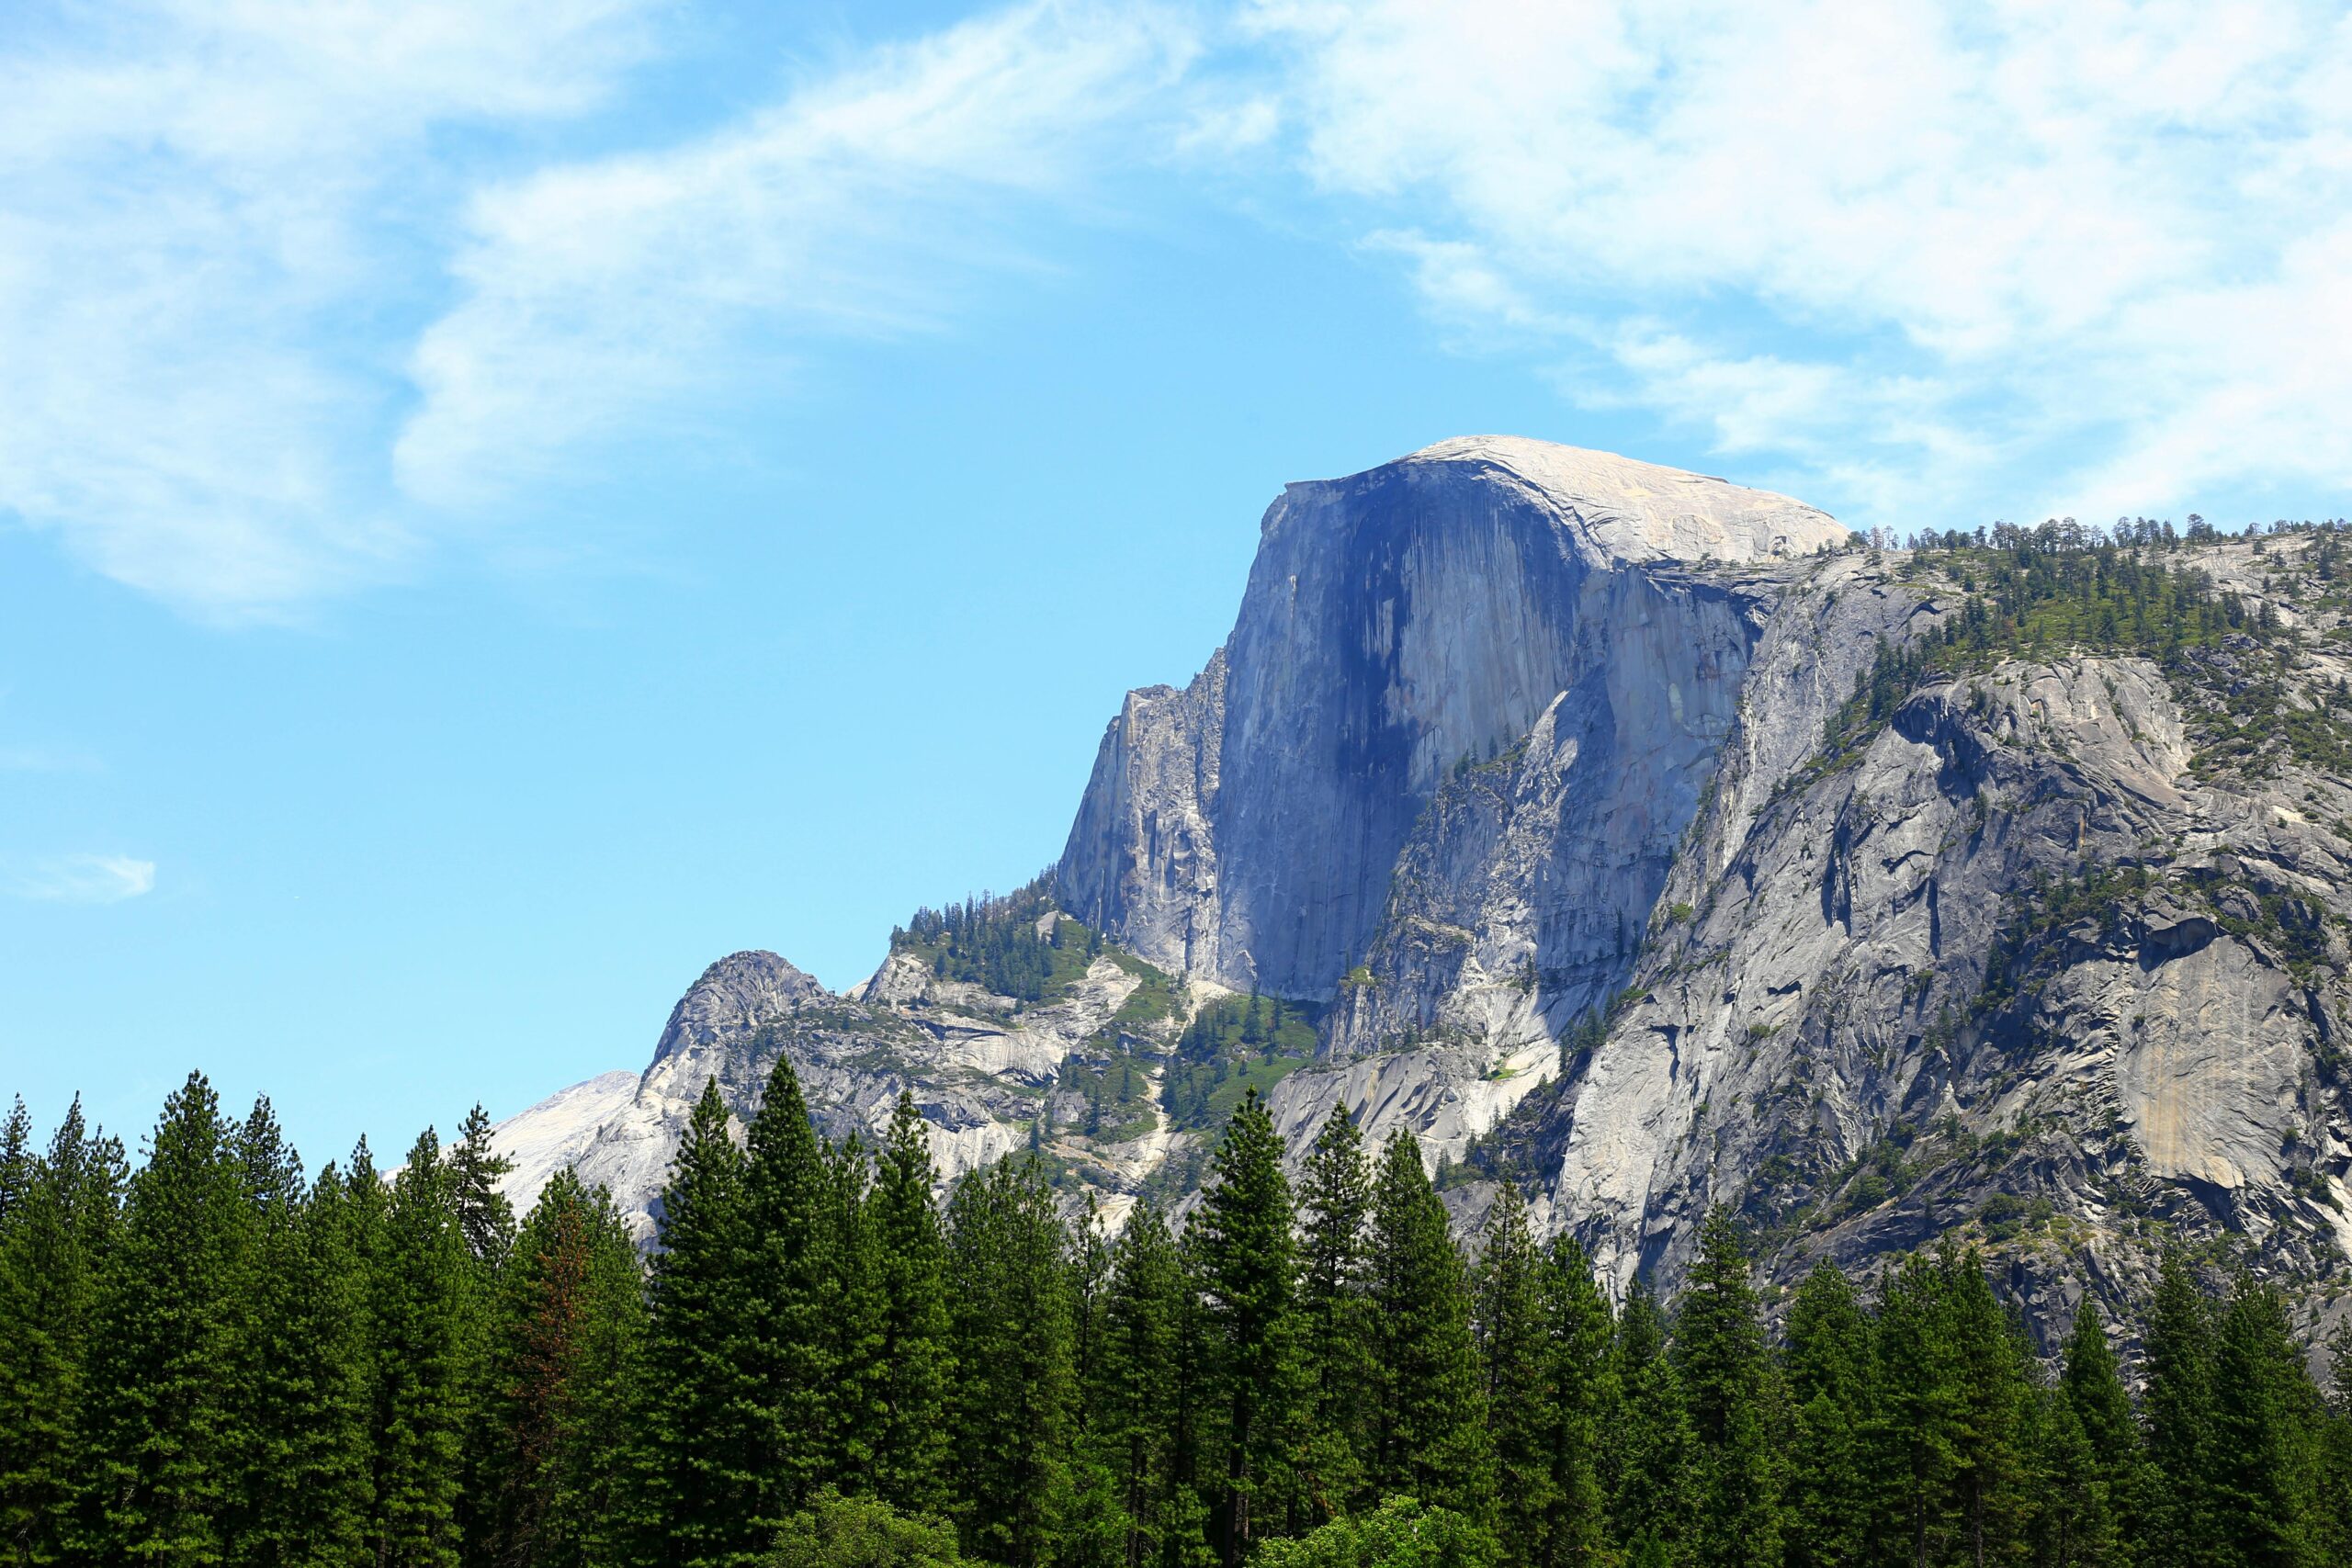
Half Dome is one of the most legendary and challenging day hikes in the United States. Towering nearly 5,000 feet above Yosemite Valley, its distinctive granite dome has long drawn climbers, hikers, and adventure seekers. Hiking to the summit of Half Dome is a serious physical undertaking, especially the final ascent up the steel cables, but the reward is unparalleled views and the experience of standing atop one of America’s most iconic landmarks.
Get more National Parks National Park News here!
Trail Overview
- Location: Yosemite National Park, California
- Trailhead: Happy Isles in Yosemite Valley
- Distance: 14–16.5 miles round trip (varies with route)
- Elevation Gain: ~4,800 feet
- Estimated Time: 10–14 hours
- Difficulty: Strenuous
- Permit Required: Yes, for the cables section
Why Hike Half Dome?
The Half Dome hike is a full-day wilderness adventure. You’ll pass waterfalls, alpine forests, granite steps, and finally ascend the steep, slick rock face of Half Dome using fixed steel cables. The panoramic views from the top are unmatched — you can see Yosemite Valley, the High Sierra, and the distant Cathedral Range.
Permit Information
To hike beyond the subdome and ascend the cables to the summit, you need a Half Dome permit. These are required when the cables are up (typically late May through mid-October):
- Preseason Lottery: Apply in March through Recreation.gov
- Daily Lottery: Apply 2 days before your intended hike date
You do not need a permit to hike to Nevada Fall or the base of the subdome.
Route Breakdown
Happy Isles to Vernal Fall
The hike begins on the Mist Trail or the John Muir Trail. The Mist Trail is steeper and wetter but more scenic. You’ll climb granite steps alongside Vernal Fall, often soaked by spray in spring and early summer.
Vernal Fall to Nevada Fall
Continue climbing past Emerald Pool to reach the footbridge at Nevada Fall. This area provides spectacular views and a natural resting point before the real climb begins.
Nevada Fall to Subdome
After the falls, you’ll hike through the forested Little Yosemite Valley before the switchbacks begin again. The subdome is a steep granite slope with no shade and punishing elevation gain.
Subdome to Half Dome Cables
The final 400 feet are the most intense. Two steel cables bolted into the granite allow you to pull yourself up the nearly vertical slope. Wood planks every few feet provide standing platforms. It’s exposed, crowded, and unforgettable.
Summit!
Enjoy the expansive 360-degree views — but stay well back from the edge. There are no rails or barriers. This is also a great time to refuel and hydrate before the long descent.
Best Time to Hike
- Late May – October: When cables are up
- Start Time: Before 6 a.m. to beat crowds and afternoon storms
- Midweek Dates: Easier to get permits and quieter trail
What to Bring
- At least 3–4 liters of water (refill at Vernal/Nevada Falls early in the hike)
- Snacks and lunch — 10+ hour hike requires real calories
- Gloves with grip for the cables section
- Sturdy hiking boots with good tread
- Sun hat, sunglasses, and sunscreen
- Permit confirmation (printed or downloaded)
- First aid kit, headlamp, and emergency whistle
Trail Conditions & Hazards
- Cables: Steep, exposed, and can be slippery — gloves are essential
- Lightning: Do not ascend if storms are in the forecast
- Heat: Much of the trail is exposed — start early and pace yourself
- Fatigue: Many accidents happen on the descent — save energy for the hike back
Alternative Routes
- Mist Trail Up, JMT Down: Makes for a less steep descent
- Backpack It: Split the hike into 2 days with a night in Little Yosemite Valley (requires wilderness permit)
FAQs
Can you hike Half Dome without a permit?
You can hike to the subdome, but you cannot legally ascend the cables without a permit when they are up. Rangers check permits at the base.
How scary is the cables section?
It’s steep, exposed, and not for those with vertigo — but thousands of people complete it each year. Use gloves, take your time, and wait for safe passing points.
Are there bathrooms?
Yes, at Vernal Fall, Nevada Fall, and Little Yosemite Valley. None near the summit or cables.
Can I turn around before the cables?
Absolutely. Many people choose to hike to Nevada Fall or the subdome and skip the final summit.
The Half Dome hike is a once-in-a-lifetime challenge that rewards preparation and perseverance with awe-inspiring views and unmatched bragging rights. If you’re up for the physical and mental challenge—and lucky enough to snag a permit—this trail will give you a Yosemite experience you’ll never forget.
Follow us on Facebook for more up-to-date National Park content!
Where to Stay
Accommodations in and around Yosemite National Park are plentiful and varied, catering to every type of traveler. Within the park, you can reserve campsites through Recreation.gov. Campgrounds like the Upper Pines, North Pines, and Lower Pines offer a true wilderness experience with the convenience of nearby amenities.
For those seeking more comfort, there are a variety of lodging options available from rustic cabins to luxury suites at the historic Ahwahnee Hotel. Vacation rentals, ranging from cozy cottages to large houses, can be found on platforms like AirBNB and VRBO.
Just outside the park, there are several KOA Campgrounds, which offer tent sites, RV sites, and cabin rentals. For a unique experience, consider staying in a yurt or glamping tent. These options offer the feel of camping with some of the comforts of home.
Hostels, motels, and hotels are available in nearby towns such as Mariposa, Oakhurst, and Lee Vining, providing a range of options for every budget.
Dining Options
Yosemite National Park offers a wide range of dining options, from fine dining at The Ahwahnee Dining Room to casual meals at the Yosemite Valley Lodge Food Court. The Mountain Room at Yosemite Lodge offers locally sourced dishes along with sweeping views of Yosemite Falls.
For a quick bite, Degnan’s Kitchen serves up sandwiches, salads, and wood-fired pizzas. Curry Village offers both a food court and a pizzeria. There are also several grocery stores within the park, such as Yosemite Village Store and Wawona Store, for those who prefer to prepare their own meals.
Don’t forget to try the park’s iconic treat – the Boysenberry Pie, available at several locations throughout the park.
Travel Tips & Safety
Yosemite’s popularity means it’s essential to plan ahead. Here are a few tips to ensure a safe and enjoyable visit:
1. Stay Hydrated: Carry plenty of water, especially during the hot summer months.
2. Pack Wisely: Bring a first aid kit, bear spray, and a flashlight. Wear sturdy shoes and dress in layers as temperatures can vary.
3. Pet Policies: Pets are allowed in developed areas, on fully paved roads, sidewalks, and bicycle paths unless there is a sign that specifically prohibits pets.
4. Altitude Awareness: Be aware of the risks associated with high altitude, including altitude sickness. Take time to acclimate and consider carrying supplemental oxygen if you have any health concerns.
5. Obtain Necessary Permits: Whether for camping, hiking, or other activities, ensure you have the necessary permits.
6. Be Bear Aware: Store food and scented items properly to avoid attracting bears.
Latest Park Alerts
Before setting off on your adventure, check the latest park alerts for Yosemite. This includes information about weather, trail closures, wildfire risks, and road conditions. Visit the official alerts page at https://www.nps.gov/yose/planyourvisit/conditions.htm.
Get Involved
Visiting Yosemite is not just about sightseeing; it’s also about conservation. Consider volunteering during your visit. Opportunities include trail work, wildlife preservation, visitor programs, and citizen science projects. To learn more about how you can get involved, visit https://www.nps.gov/yose/getinvolved/volunteer.htm.
Visiting Yosemite National Park is a stunning adventure, full of natural beauty and opportunities for outdoor activities. With careful planning and respect for the park’s regulations and wildlife, it will be an unforgettable experience.